REMOVING HAIRS: Get tips of very fine tweezers as close as possible to the skin and tug quickly/firmly. Caribou and other hoofed animals tend to have brittle fur that breaks easily. Some hairs, like seal, are hard to pull out. Be sure to get a sample of the underfur. The maximum length of a hair is one of the clues we look at, so try to get the full length of the hair. Also, there is information to be had from both the root end (proximal) and the tip end (distal) of the hair, and in some animals the scale pattern changes as it goes along the length.
MOUNTING: An individual hair might be too long to get the whole thing under a coverslip, so using tweezers and a small scissors, mount one end, snip, and mount the other. For thick hairs, like caribou, use a pencil eraser to squish down the coverslip and hold until dry. Bubbles? Your meltmount might be too hot. It helps to work with the slide directly on the hotplate, with one end sticking off to grab. Useful to leave a bit of hair sticking out from the medium to give more options in examining the scale pattern. There is plenty of room to put two samples side by side on a single slide using two coverslips, so consider mounting guard hairs and underfur in two separate mounts. This is especially key when the guard hair is much thicker than the underfur, because the guard hair will mount nice and flat but the underfur might not if mounted together, meaning you’ll have a hard time getting the underfur in focus.
LOOKING: To see scale pattern better, try adjusting the light level through the aperture. More light helps in examining the medulla, while less light is helpful for looking at scale pattern. Try looking under crossed polars. Try looking with reflected light instead…actually, a portion of the hair that is NOT in the medium works better when looking with reflected light. The lighter areas of the hair show up better, so on a banded hair look at the lighter bands for more info than the darker bands.
SCALE CASTING: Use a clean glass slide and a tube of Duco Cement. Have the hair fiber on hand and at the ready. Squeeze a consistent and thin amount of Duco onto the slide. If the hair is wavy, try to match that wave rather than trying to stretch the hair fiber in an unnatural way. You can place the blank slide on top of your wavy hair and you can trace a wavy line on top of the slide in Duco. Place your hair fiber into the clear adhesive and allow it to dry in place. This should take about 5 minutes or less, depending on how thin your application was. Now pull your hair fiber out of the Duco by either using tiny tweezers to pry up and remove the fiber, or if the hair was very long and extended past your Duco application, then just pull it up with your fingers. Your slide is ready for viewing now! See Appendix A (scale casting) to have a look at the experiments that were done to try to figure out a medium to give the best and most consistent results.
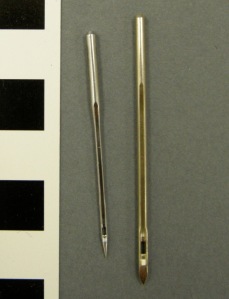
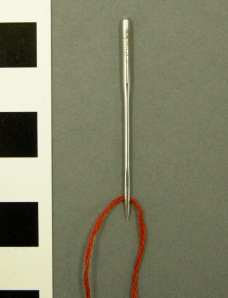
CROSS SECTIONS: First drink some wine, but keep that cork! To make cross sections by hand you will need cork (synthetic or natural) a sewing machine needle, synthetic thread, a thin stainless steel razor, clean glass slide and your hair fibers. Cut your cork in half, and thread the sewing machine needle with a thread that contrasts nicely with your fiber. The threaded sewing machine needle is inserted into the cork, push it until a little loop of thread appears at the other end and there is plenty of string hanging from the other end- you will need this to pull your fiber through with later. Now,take a pin (or bamboo skewer) and place into the little loop that you have created. This will serve as a place holder while you pull the sewing machine needle out. This will be done from the same direction that you placed it in. Take a bunch of synthetic fibers and the fiber you are examining and twist them together. Then place them inside the little loop that you have formed. Once all of your fibers are tucked into the loop, use the bottom two strings protruding from the bottom of the cork to pull your fiber bundle into the hole created by the sewing machine needle. Now you are ready to start making thin slices of the cork and your fibers. As soon as you slice a few good ones, place a glass cover slip over your sections and have a look. You can use a bit of pressure sensitive tape to hold the cover slip in place. There are step by step illustrated images to this process in Appendix B (part 8).
APPENDIX A SCALE CASTING (courtesy of Lauren Horelick) :

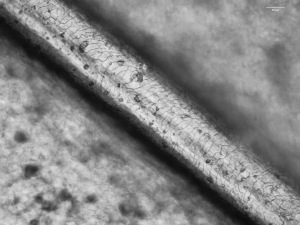
Scale Cast from the guard hair of a Lynx at 400x Transmitted light. Scale Cast was done with Duco Cement.
______________________________________________________________
Introduction.
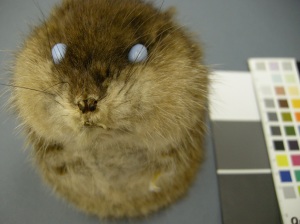
In the fall of 2009 Ellen Carrlee and I began working on the Alaska Fur ID project. For this project we took hundreds of photographs of animal pelts, taxidermy specimens, and objects with known animal hair attribution. Hair fibers were removed from the various specimens with very pointy tweezers (described above), and mounted on glass slides for observation and photographing with the polarized light microscope (PLM). After salient features of the hair fiber samples were documented with written text in addition to annotated images, the logical next phase of the project was to start looking at scales cross-section, as these features combined with the information about the medulla can help in identifying animal origin.
Scales are present on the cuticle of all mammal hairs, and many techniques have been used to capture impressions of these scales for observation and analysis. Likewise, methods to create cross-sections range from very low-tech hand sectioning techniques, to the high-tech use of microtomes some of which can come with very fancy freezing stages.[1] Techniques to produce scale impressions or casts, as well as cross-sections have been put forth by conservators, archaeologists, mammologists, zooarchaeologists, and who knows maybe some über science fair kid.
Techniques described in the literature in the aforementioned fields was mined to extract the most straightforward, quick, and inexpensive method that could continually produce excellent results. A quick and low-tech inexpensive method was sought after because the Alaska Fur ID project aimed to include diagnostic information for nearly 50 different mammals. The “winner” of the best scale cast and cross-section technique would be used exclusively by a skilled (non-conservation) museum intern to produce the impressions and cross-sections mammal hairs on mass, before they could be photographed.
In case you are dying to know who the “winner” is and you don’t have the time to read through this entire posting, I will tell you that we found that Duco Cement proved to be the best, and most consistent material to use for scale casting. Wine cork worked just great for producing cross-sections, and I provided step-by-step instructions on how to use the wine cork later in this posting.
Duco Cement does contain cellulose nitrate, and conservators (largely in the United States) have been trained to fear, loathe, and generally bristle at the material whose name must not be said aloud (cellulose nitrate). However, the material has its utility as I show here.
2. Scale Casts
Several experiments were conducted to determine the easiest method to achieve excellent scale casts with minimal steps and variables that might influence the final product. I have identified three main methods that have been used to prepare scale casts. These methods include the use of:
A: Aqueous films
B: Heat activated films
C: Dry mounted samples
Within categories A and B a whole host of commercial and conservation products have been used to impregnate fibers into a matrix for later removal, followed by observation with high powered magnification to see the impressions left of cuticular scales. Many of the techniques presented in the literature claim to yield excellent results with both aqueous and heat activated films. The experiments presented here compare techniques and materials used in the literature with the aim of producing consistent excellent casts of fur scales.
2.A: Category A- Aqueous films
The use of films produced by aqueous solutions has been extensively used and written about in conservation, and archaeology texts due to the availability of materials that form thin, transparent, stable films that can be pressed into service for scale casting. Ogle and Mitosinka in 1973 devised a quick and easy method of making scale casts using a Polaroid film-print coater (Deedrick and Koch 2004). Researchers in conservation, and forensics have utilized acrylic resins in the form of Paraloid B-72 or clear nail polish (attribution unknown) in addition to PVA resins, and even solutions of gelatin (Goodway 1987 and Bolton 1986).
The technique of using wet media to create a scale cast essentially involves applying a layer of the chosen media onto a glass slides and allowing a film to form with a hair fiber pressed into it. Once the film is dried or becomes tacky, the fiber is removed revealing an impression or cast of the cuticular scales.
2B:Category B-Heat activated films
Hardy and Plitt (1940) discovered a method to create scale casts with a heat-activated film, which is advocated by zooarchalogist Mayer (Mayer 1952:480-512). Mayer used the Hardy and Plitt method extensively for his article “Hair of California Mammals with Keys to the Dorsal Guard Hairs of California Mammals.”
The Hardy and Plitt technique involves the use of a transparent thermoplastic film, manufactured by the Dow Chemical Company under the trade name “Ethocell’ which was available in varying degrees of thickness. The hair was placed between two sheets of Ethocell, which was then sandwiched between two blocks of wood and heated at 194 ºF (90 ºC) for twenty minutes (Mayer 1952:480-512). When the plastic sandwich was disassembled, the hair is removed leaving its impression.
2C:Category C- Dry mounted samples
A method developed by Corcker (1998) at the Center for Forensic Sciences in Toronto, Canada, sandwiches a hair fiber between a glass slide and a cover slip held in place with clear tape as a temporary mounting medium. The sample is then observed with transmitted light with high-powered magnification, allowing for quick observation of the scale pattern. Brown advocates this technique in his 1942 article “The Microscopy of Mammalian Hair for Anthropologists.”
3. Scale Cast Experiments
3.1 Methodology
Category A: Aqueous films
The following six different aqueous mediums were used for scale casting :
1) Liquitex Matte Medium; an artists medium used for bulking acrylic paints. Application method: The Liquitex matte medium has a yogurt-like consistency and was applied onto the slide with a flat wooden coffee stirrer (stolen from local coffee shop). The film that was applied aimed to be as thin and even as possible.
2) Duco; an adhesive composed primarily of cellulose nitrate sold in a tube as a fix-all cement. Application method: Duco comes in a tube with a fine tipped nozzle, which was used to press out a thin and even film of the medium.
3) 30% Acryloid B-72 in acetone; a thermoplastic acrylic resin used as an adhesive and consolidant in conservation. Application method: B-72 was applied onto the glass slides with a plastic transfer pipette.
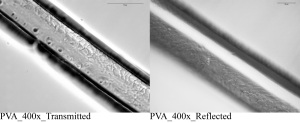
4) 40 % PVA-AYAT 50/50 acetone/ethanol; a thermoplastic resin of vinyl acetate. Application method: applied onto the glass slides with a plastic transfer pipette.
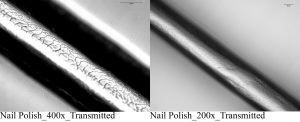
5) Sally Hansen-Hard as Nails nail polish; an over the counter clear acrylic nail polish. Application method: The nail polish has a nylon brush applicator, which was used to apply the polish onto the glass slide in a thin and even film.
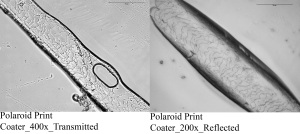
6) Polaroid Print Coater, a commercial product with proprietary ingredients used to coat freshly developed Polaroid prints. ( MSDS claims that it contains Isopropanol/Isopropyl alcohol, zinc acetate dihydrate, glacial acetic acid, 3-7%). Application method: The Polaroid print coater is a small round tube enclosing a felt squeegee saturated with the medium that is run over the glass slide making a thin film.
Each of the aqueous mediums was applied onto a glass slide as indicated above, and a fiber from the same animal, in this case I used a Musk ox fiber to place in each of the wet films. The films were then allowed to dry and the animal hair fiber was removed. This was done first by prying up a small section with a pin so that tweezers could grasp the hair and slowly pull it out.
The six different media were evaluated for drying time, handling properties, viscosity, and the success of the final cast. Success is largely measured by how much information can be derived from the detail in the scales captured in the scale cast. Each of the casts was observed with reflected and transmitted light and digital images were taken of both for a visual comparison of the results. The following values were ascribed for each category used to determine a successful cast.
1= Fast drying (5-10 minutes), easy to handle, reasonable thickness. Successful cast.
2= Moderate drying (within an hour), somewhat challenging to handle, moderately thick, moderately successful cast.
3= Slow to dry (over two hours), very challenging to handle, too thin, unsuccessful cast.
3.2. Results: Category A. Aqueous films.
__________________________________________________________________________________________________________________
Material: 30% B-72 in Acetone
Drying Time: 1, Dried within 2 minutes
Handling: 3, A bit runny for this application
Viscosity: 3, Has low surface tension and spread out quickly-difficult to embed the fiber before the film dries.
Success: 2-3, Mixed results, but where the scales showed up they are very clear.
Notes: In some areas the cast came out well, but it is not possible to see the entirety of the hair-due to the fast drying of the film not getting the impression in time.
___________________________________________________________________________________________________________________
Material: Duco Cement
Drying Time: 1, Film dries in 5 minutes
Handling: 1, Comes in a tube and is easy to squeeze out in a consistent layer.
Viscosity: 2, Semi-viscous and forms a film with high surface tension.
Success: 1, Details of scales are visible consistently.
Notes: Material was very easy to use and the scales are clearly visible.
_______________________________________________________________________________________________________________________________
Material: PVA-AYAT
Drying Time: 1
Handling: 3, a bit runny for the application with very little control.
Viscosity: 3, not viscous enough
Success: 3, Terrible, terrible, terrible…could it be more terrible?
Notes: Possibly if the material was mixed in a higher concentration it could work well.
_____________________________________________________________________________________________________________________________
Material: Sally Hansen “Hard As Nails” Acrylic Nail polish
Drying Time: 1
Handling: 1
Viscosity: 2-3, Success of cast appears to have to do with the thickness of the film.
Success: 2-3
Notes: Not always consistent in results, plus the nail polish is quite stinky ( unless of course you like that smell).
________________________________________________________________________________________________________________________________
Material: Polaroid Print Coater
Drying Time:1, The Polaroid medium may have been a bit dried up for use. What was there dried very quickly.
Handling: 1
Viscosity: 3
Success:2
Notes: Only a small area of the cast showed up, most likely because of the fast drying film. What is great about this material is the little squeege that delivers the film-I think if the squeege could be re-saturated it would great.
___________________________________________________________________________________________________________________________________
4. Category B: Heat Activated films
4.1. Methodology
The following six different mediums were used for scale casting :
1) B-72
2) PVA-AYAT
3) Golden Medium Regular Gel semi-gloss
4) Duco Cement
5) Polyethylene sheet
Films of Golden Medium, B-72 and PVA-AYAT were cast out onto silicone release Mylar and allowed to dry overnight. The films were spread out onto the Mylar with 1” of space between each so that the Mylar could be folded over the hair fiber. A polyethylene sheet was also used to imitate the “Ethocell” described n the literature. All of the films were used for scale casting by placing a Musk ox fiber in between the film and the silicone release Mylar. For the plastic experiment, the hair fiber was embedded in between two pieces of the plastic. Each film with embedded fiber was placed between two wooden blocks, which were C-clamped together and placed in the pre-heated lab oven once it had reached 160 F. The samples were left in the oven for 20 minutes while the heat steadily reached 160F. Once the 20 minutes were up the clamp assembly was removed, and the hair fibers were pulled out with tweezers .
The film of Duco was not heated in the oven because it contains cellulose nitrate and is extremely flammable. The Duco film was used for casting by placing the fiber sample between the dried film and a piece of silicone release Mylar. A heated spatula with a wide and flat tip was used on a high setting to melt the Duco enough to create a scale impression.
4.2 Results
Only the degree of success was evaluated for this process (1= best, 3= worst).
_______________________________________________________
Material: B-72
No Results
Success: 3, no results
Notes: The hair fiber became too deeply imbedded into the film and the film tore apart while trying to remove it.
__________________________________________________________________
Material: PVA-AYAT
Success: 2, not great, but you can see scales.
Notes: What is nice about this film is the potential to see how the hair changes along the length by placing the long strip of film on the microscope stage and moving it along.
________________________________________________________________
Material: Golden Medium Regular Gel semi-gloss
Success: 2-3
Notes: Removing the fiber pulled away much of the information about the scales, although where this did not occur there is a somewhat clear scale impression. The filler/bulking agents used in this medium interfere with observation as well.
____________________________________________________________________
Material: Duco Cement
Success: 1
Notes: Dried film curls a bit at the edges making photography difficult, but where it’s possible to see the scales they show sharp detail.
___________________________________________________________________
Material: Polyethylene sheet

Polyetheylene Sheeting_200x_Reflected. click to enlarge (though its perfectly clear how terrible this one turned out).
Success: 3
Notes: Perhaps if the bag was heated more, or for longer , this technique might work well (or -not so hot a technique).
_____________________________________________________________
5. Category C: Dry Mounted Samples
5.1 Methodology
A Musk ox fiber was pressed in between a glass cover slip and a glass slide. The cover slip was held in place with clear pressure sensitive tape.
Results
Success: 2-3
Notes: The scales are visible on half of the fiber and they show a decent degree of detail. However, the thickness of the fiber makes capturing the information in focus tricky due to depth of field issues with PLM.
__________________________________________________________________
6. Brief discussion of results of scale casts from category A, B and C.
For the wet films category the Duco cement yielded great detail, was easy to apply, and had a fast setting time. While Acryloid B-72 also provided a good scale cast, the application method and viscosity proved troublesome. The nail polish also provides good casts, however the application requires fiddling around to achieve the right amount of thickness to get a good casting.
All of the heat set films were terrible on the whole, and the dry mounted sample was very average. In conclusion, we arrived at using Duco Cement for all of our scale casts because it was the fastest, and easiest to use (also, it costs about 5 dollars).
________________________________________________________________
APPENDIX B: CROSS SECTION EXPERIMENTS
7. Cross sections
In graduate school I was introduced to a small torture device in the form of a black perforated sheet of plastic from which to make cross-sections. You were supposed to pull fibers and your sample through one of the little holes with a needle threader and then slice either side of the fibers to get a cross section. I struggled with this technique, finding that you waste a lot of your sample if your cut isn’t clean, or if the fiber is just slightly askew. The methods presented here are offered as alternatives to this method, and those that require the use of a microtome because many labs and individuals do not possess this equipment. Experiments were performed by hand sectioning after embedding fibers with the following mediums:
1. Cork- synthetic and natural
2. Potato ( Ukon gold-but any will do)
3. Closed-cell foam
4. Gel Medium
Multiple authors have developed methods to achieve cross sections by imbedding sample material into various media followed by hand sectioning(Goodway 1987, Heyn 1954). Goodway (1987) successfully made cross sections by gluing fibers with mounting medium in between pieces of cork, followed by clamping the cork together with C-clamps, and then carefully shaving off the cork in thin slices.
Another technique involving hand sectioning is described by Heyn (1954) whereby a long sewing machine needle is threaded with nylon yarn through the center of a piece of cork. Then a pin is placed through the protruding loop and the needle is withdrawn, leaving a loop at the top and two dangling strings at the bottom of the cork. A bundle of fibers are then placed through the loop at the top, so that essentially the fibers are now horizontal to the top of the cork. Then the two strands of yarn dangling down from the bottom of the cork are used to yank the fibers down through the cork. The cork is then sectioned by hand. The resulting slices are then placed on a glass slide with a cover slip taped down.
Personal correspondence with microscpists John Delly (of McCrone) indicated that cross sections can also be made by using a sewing machine needle in the method described above, used in conjunction with not cork but a potato. He also reports success in using balsa wood as a replacement for the cork (personal correspondence 11.09).
The methods using cork and potato are ideal for longer hair fibers, however, these methods will not work well for short hairs, such as seal fibers. I experimented with methods to create cross sections for these shorter hairs by using a plastic transfer pipette that was cut in half to crate a shallow curving dish. Inside the dish was placed Artists Gel Medium bulked with glass micro-balloons and the hair fiber was imbedded into it. Once dry the medium and hair fiber can be hand sectioned.
7.1 The Cork Method
Methodology
Cross sections were made with the technique described by Heyn (1954) with natural and synthetic cork as the matrix for embedding fibers. Experiments were also carried out using a potato as an alternative to cork, which was suggested by Delly (Personal correspondence 2009). Alternative media was also experimented with in the form of polyethylene closed-cell foam. Balsa wood was recommended, but at the time of the project there was a shortage of Balsa in Juneau.
Results
Brief discussion of the results:
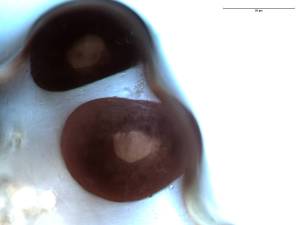
All of the materials were very easy to use and produced decent-looking cross sections, with the exception of the closed-cell foam. The potato was very easy to cut into thin slices, however, the moisture from the potato started to obscure observation of the medulla. Additionally, this method is not practical for long term preservation of the slide.
7.2 Transfer pipette method
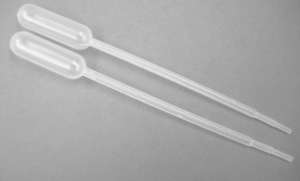
A second round of experiments was carried out to determine the efficacy of using the artist’s material Golden Gel Medium ( Regular Gel) Semi-gloss as an embedding material for shorter fibers that could not be used with the cork method. A method was devised where the paste-like gel was first applied into a plastic transfer pipette tube that was cut in half. These two halves made shallow and curved containers. Gel Medium was placed into these containers with a flat wooden stick so that it filled the tube. The sampled hair fibers were placed into the medium in a longitudinal direction and pressed down-so to sink further into the medium. A bit more medium was then applied on top of the fibers to fully encase them. The medium was allowed to dry overnight. Once dry, the plastic tube with medium was sliced thin with a double edged stainless steel blade, and the sections were placed on glass slides with cover slips for observation (cover slips were taped into place).
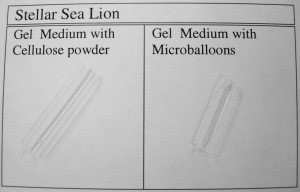
After a first round of observing the cross sections, it was noted that the Gel Medium films shrink when dried about 80% (takes about 2 days). Subsequent experiments were performed in which the Gel Medium was bulked with cellulose powder in a 1:2 ratio (cellulose powder to Gel Medium), and glass microballoons were mixed in a 1:1 ratio with the Gel Medium.

Plastic transfer pipettes filled with fiber samples and gel medium bulked with (right) microballoons, (left) cellulose powder.
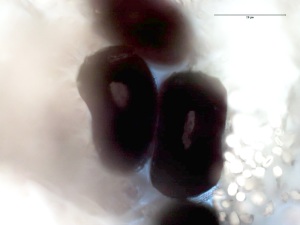
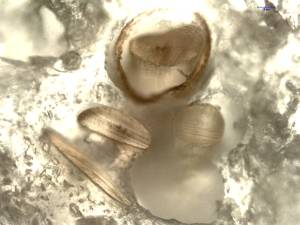
Once dry the Gel Medium embedding material was hand sectioned and multiple slices were placed on a glass slide with a cover slip taped into place. These cross sections were observed with PLM in transmitted light and digital images were taken.
Results
Brief discussion of the results:
The Gel Medium with 1:1 cellulose fibers worked well, though the microballons may be a bit distracting, they appeared to hold the fibers in suspension. The film did not shrink at all, and it was very easy to apply into the tube.
The Gel Medium with 1:2 cellulose powder also worked well, though it was hard to apply the mixture into the tube ( its a bit goopy). The film shrunk about 10-15% and became tangly when the fibers were embedded. This made it difficult to try to get the fibers parallel to one another. The cellulose powder is not distracting for observation and appears to hold the sections well within the matrix .
___________________________________________________________
8. Cork Method Step By Step How To:
The procedure described by Heyn (1954)( see above) was followed using both natural and synthetic cork to create cross sections. The cork used came from various wine bottles and were all 3 ¾ in length.

Synthetic cork used for making cross section. At Right is the cork sliced a bit smaller for ease of use.
1 st: The cork was cut into smaller sections for easier handling.
2nd: A sewing machine needle is threaded with a synthetic fiber to make distinction between the fiber sources apparent.
3rd: The threaded sewing machine needle is inserted into the cork, push it all the way through until a little loop appears at the other end. No need to push it all the way through. You will need that extra string hanging from the other end.
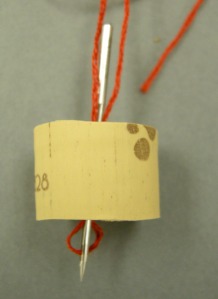
Push the threaded needle through the cork ( as above) until you see a little loop forming at the top.
4th: Take a pin (or bamboo skewer) and place into the little loop that you have created. This will serve as a place holder while you pull the sewing machine needle out. This will be done from the same direction that you placed it in.

In this image the sewing machine needle has been removed and the pin is holding the loop open for your bundle of fibers to be inserted.
5th: Take a bunch of synthetic fibers and the fiber you are examining and twist them together. Then place them inside the little loop that you have formed. Once all of your fibers are tucked into the loop, use the bottom two strings to pull your fiber bundle into the hole created by the sewing machine needle.

In this image the fibers are pulled through the cork-there is a bit extra hanging out the back, but thats alright, because I know that the fibers that I want to examine are within the cork.
6th: Now the fun part! OK this is optional, but it makes slicing a lot easier: if you cut away some of the cork, you make less of a job when trying to cut a perfectly thin slice though all that cork. Try slicing away material around your fibers so that you have a neat little square, or something that makes for less cutting.

The cork sliced back a bit to make less work in trying to cut a really thin and consistent cross section. The thin double blade stainless steel razors are very good for cutting.
7th: And now you can start slicing. If your first couple of slices are not great, that’s OK because your fiber is embedded all the way back into that cork. You now have plenty of opportunity to practice making great hand sections.
Have fun and look out for fingers. I used this exact technique with the potato examples, and it worked great-despite the fact that the potato retained a lot of water and made the fibers move around on the slide.
___________________________________________________________________
[1] See Arlen Higginbotham and his wood cross-sectioning methods










2 Comments
Here’s a link to another transfer pipette method (embedding the fiber in the polythene of the pipette by heating) which is fast and gives me pretty good results — the resulting polythene billet is almost exactly the right thickness and toughness for cutting good sections with a single-edge razor.
http://fieldmuseum.org/users/jp-brown/blog/cross-sectioning-fibers
Nice blog posting JP ! Super-clear language, great images, a hint of levity (like the tiddlywinks, for example!) this looks like a great technique and you’ve done us all a service by writing it up and posting it. Looking forward to trying it…